This is a startup post to get your dev environment setup for diving into Deep Learning. I have chosen to begin with TensorFlow and Keras for this task. I would be using the Jupyter notebook for demonstrating the dev setup.
Note: Jupyter itself is self sufficient for this task,
but I am using PyCharm for this task just to test the interoperability of PyCharm
with other ecosystem stack.
Create a new project with virtual env
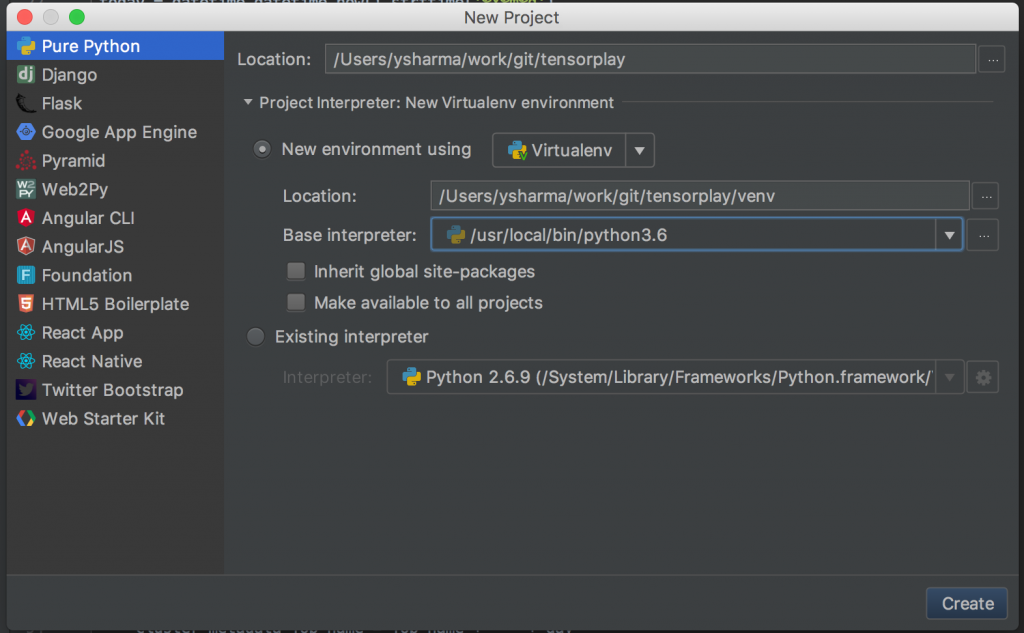
Create a new Pure Python project in PyCharm and provide the settings for a virtual env. Pre-requisites for this step are python and virtual env. Make sure you have these steps before creation of new project:
- Install Python
- Install pip
- Install virtualenv (
pip install virtualenv)
PyCharm settings for new project. Make sure you chose python 3.6 for the virtual env :

Activate the virtual env if not already activated:
- Open the terminal from PyCharm
- Activate virtualenv :
$> source venv/bin/activate

Terminal command:

Install all python requirements for our project
Create a requirements.txt file in the project and add the python dependencies in it.
numpy
scipy
tensorflow
tensorflow-gpu
keras
ipython
jupyter
six
protobuf==3.1.0
wheel
It should prompt you to install the dependencies, click on Install requirements. Or alternatively you could use the command line to install all the requirements:
pip install -r requirements.txt

Packages installed:

Create a Jupyter notebook
Jupyter notebook can be created via PyCharm or directly on the console.
From PyCharm
- Create a Jupyter notebook
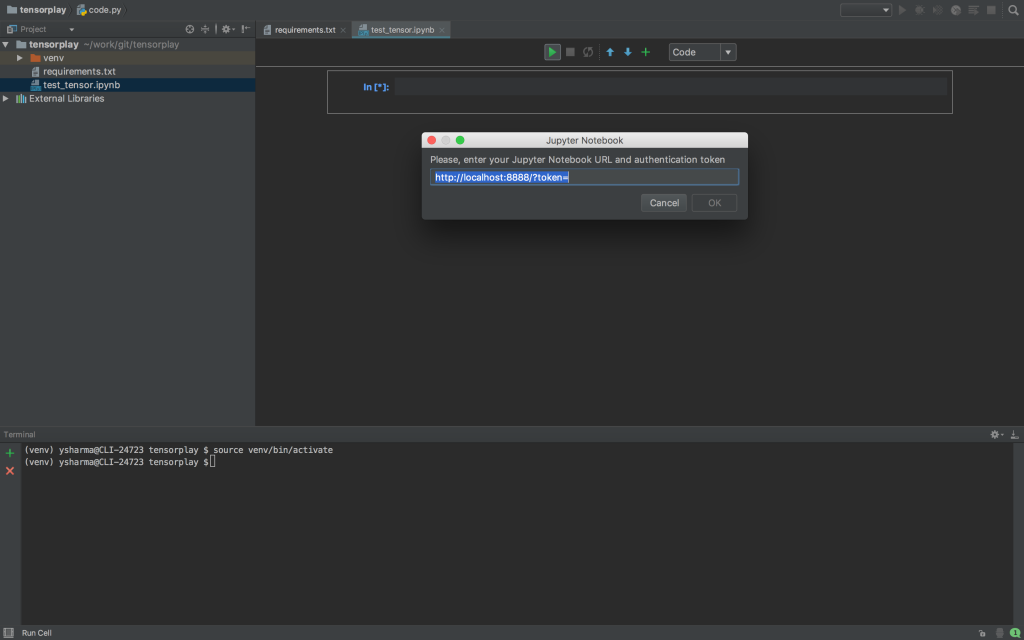
- Click on the Play button to connect to Jupyter
- Hit cancel, to create local run configurations
- Click on the notification saying – Run Jupyter notebook
- Optional – open the Jupyter link in browser


Output:

Directly from console if you only want to use Jupyter:
Hit this command on the console:
jupyter notebook
Then visit the browser with the printer URL on console.

Test some sample code
The sample code to test here has been picked from : tensorflow-visualization.
Use the below code on the browser or PyCharm to visualize a graph.

Thats all for this quick post. Hope its helpful.
Extra (troubleshooting):
TENSOR Installation Error:
- Dependency on cuda: Refer https://metakermit.com/2017/compiling-tensorflow-with-gpu-support-on-a-macbook-pro/ . Install Cuda dependencies as mentioned in the post.
- Dependency on other python modules: Refer : https://stackoverflow.com/a/42596864/1562474

Why must we choose python 3.6 for the virtual env?
@srae: on 3.7, tensorflow does not work (for now, 12.2018)
Thank you. WORKED PERFECTLY